
3.1.5.2 JSON Module
Besides the normal page-types in SmartWeb. We have modules/json, a special kind of module. This page is special in the way, that it doesn’t load the rest of the template system. It only loads the single template (-and partials) defined in the files inside it. All files here load with the “Content-Type: application/json” document header. Meaning it is ideal for outputting and generating JSON data.
In the SmartWeb standard templates, we use this pagetype to generate JSON data (asynchronous data) for things like productlist and product variants.
Within this folder you can modify existing files in order to add data to your website, like the productlist or the productpage. Just remember that these files are necessary in order for the templates to function and editing them could result in loss of functionality.
Besides editing or adding data to existing files, you are also able to create your own JSON resources that your customers/visitors can take advantage of. For example: You could create your own blog or news ticker by creating your own JSON file and outputting data with the use of Controllers, Collections and Entities. One thing to keep in mind when creating new JSON files is that you need to write the JavaScript for your website that handles this new data. This is something the existing files already have, because it is already built into the SmartWeb templates.
Within these JSON template files you will find a modifier called “jsonify”, which is usually called at the bottom of a template. Jsonify takes an array of Smarty data, that is created inside of a template file and it formats it as JSON, so the data can be used by JavaScript.
Example 1
Go to: [template_name]/modules/json folder. It is here you can create or edit JSON files with the use of Smarty. In this example we will edit the products.tpl file and add some custom data to it. Products.tpl is the files that generates all the JSON data, which together with AngularJS is what is used to generate the productlist.
Step 1: Assign a product controller (Since we are editing this has already been done for us).
*CODE* *SNIPPIT* {controller assign=controller type=product}*CODE*
Step 2: Assign a product collection (Since we are editing this has already been done for us).
*CODE* *SNIPPIT* {collection assign=products controller=$controller productId=$value}*CODE*
Step 3: Add a custom description to the products variable with the following format.
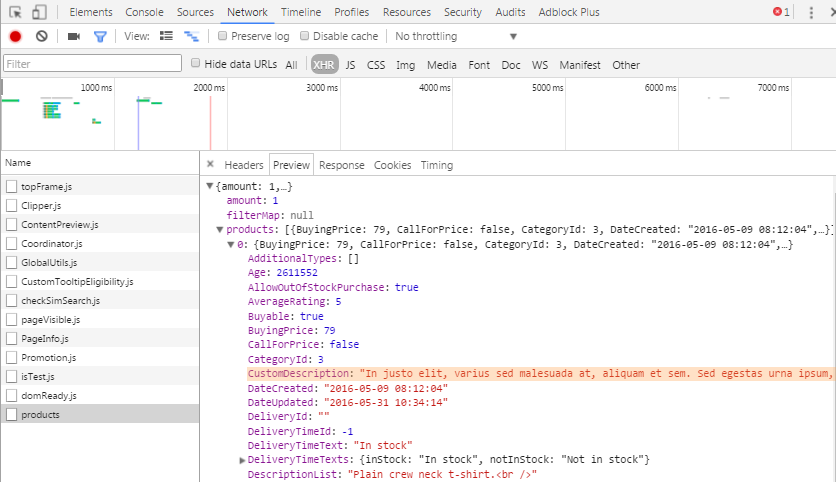
*CODE* *SNIPPIT* {$product['CustomDescription'] = 'Duis vel semper orci, quis vehicula elit...'} {$output|jsonify}*CODE*
WARNING: If you do not include jsonify at the bottom of the file you will need to add all of the formatting manually.
Step 4: This custom description is then formatted and outputted as JSON to the browser (This can be viewed in the DOM Inspector in your browser, See the image below).
Step 5: You can now proceed to use this data on your productlist using the AngularJS templates. Mainly modules/products/partials/list-js-col.tpl and modules/products/partials/list-js-row.tpl. That are the templates, that represent the product in the productlist in row and column view.